nps内网穿透需要安装客户端和服务端,地址:
https://github.com/ehang-io/nps/releases // 官方地址,但因为长时间不更新,bug很多
https://github.com/yisier/nps // 改版(推荐)
按电脑架构安装指定的安装包,比如我的机器是armbian

可以选择armv7或者arm64安装包
查看架构方式
uname -m // 方式1
arch // 方式2
lscpu // 方式3
如果是使用公网服务器来做内网穿透,服务端是部署在公网服务器,客户端是在内网;且server和client安装包可根据对应的架构来选择不同的安装包
下载armv7服务端和客户端安装包

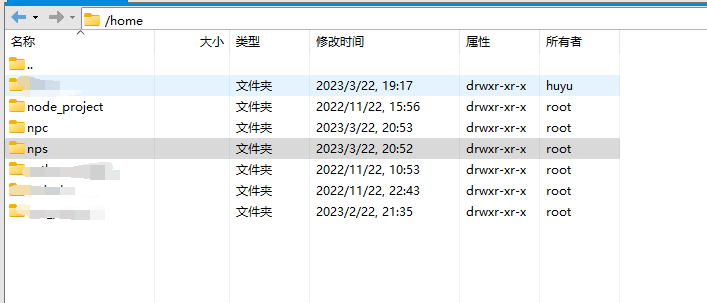
使用xftp将2个压缩包传送服务器,这里我建了2个文件来保存npc和nps

分别进入npc和nps,解压安装包
tar -zxvf linux_arm_v7_client.tar.gz
解压后的文件

首先安装nps,因为需要借助web后台可视化操作
./nps install
安装成功后,会提示/etc/nps/conf/nps.conf中可以修改配置
appname = nps
#Boot mode(dev|pro)
runmode = dev

#HTTP(S) proxy port, no startup if empty
http_proxy_ip=0.0.0.0
http_proxy_port=7003
https_proxy_port=7001
https_just_proxy=true
#default https certificate setting
https_default_cert_file=conf/server.pem
https_default_key_file=conf/server.key

##bridge
bridge_type=tcp
bridge_port=7002
bridge_ip=0.0.0.0

# Public password, which clients can use to connect to the server
# After the connection, the server will be able to open relevant ports and parse related domain names according to its own configuration file.
public_vkey=123

#Traffic data persistence interval(minute)
#Ignorance means no persistence
#flow_store_interval=1

# log level LevelEmergency->0  LevelAlert->1 LevelCritical->2 LevelError->3 LevelWarning->4 LevelNotice->5 LevelInformational->6 LevelDebug->7
log_level=7
#log_path=nps.log

#Whether to restrict IP access, true or false or ignore
#ip_limit=true

#p2p
#p2p_ip=127.0.0.1
#p2p_port=6000

#web
web_host=a.o.com
web_username=admin
web_password=123456
web_port = 7000
web_ip=0.0.0.0
web_base_url=
web_open_ssl=false
web_cert_file=conf/server.pem
web_key_file=conf/server.key
# if web under proxy use sub path. like http://host/nps need this.
#web_base_url=/nps

#Web API unauthenticated IP address(the len of auth_crypt_key must be 16)
#Remove comments if needed
#auth_key=test
auth_crypt_key =1234567812345678

#allow_ports=9001-9009,10001,11000-12000

#Web management multi-user login
allow_user_login=false
allow_user_register=false
allow_user_change_username=false


#extension
allow_flow_limit=false
allow_rate_limit=false
allow_tunnel_num_limit=false
allow_local_proxy=false
allow_connection_num_limit=false
allow_multi_ip=false
system_info_display=false

#cache
http_cache=false
http_cache_length=100

#get origin ip
http_add_origin_header=false

#pprof debug options
#pprof_ip=0.0.0.0
#pprof_port=9999

#client disconnect timeout
disconnect_timeout=60
文件中的部分端口可能需要修改,首先使用nps start启动nps,然后使用nps命令,可以查看日志

此时,应该可以访问到管理后台

登录后,创建客户端

创建客户端


点击加号,获取客户端命令
2.进入npc
cd /npc
./npc install -server=xxxxxxxx:8003 -vkey=xxxxxxxxx
npc start
成功启动后,客户端的连接情况会显示连接成功

新建tcp隧道

看使用场景,服务端填服务器的端口,而目标填需要内网代理的设备的ip+端口
3.开机自启动
按上面操作npc install后,npc其实已经是一个服务了
编写start_npc.sh
#!/bin/sh
cd /home/npc
npc start
为其设置权限
chmod 777 start_npc.sh
在rc.local中添加该脚本
sudo nano /etc/rc.local
在exit 0 前增加
/home/npc/start_npc.sh start
exit 0
评论列表
已有0条评论